The first time I tasted authentic Texas chili, the absence of beans was a revelation. It was a bowl of deep, brick-red broth, thick with shredded beef and powered by a complex chili powder that was unlike any supermarket blend I had used before. The flavor was earthy, slightly smoky, and had a warmth that built slowly rather than attacking the palate.
That experience sent me on a quest to understand the foundation of that flavor, which led me directly to a small, red-and-yellow can from a small south Texas town: Mexene Chili Powder. This recipe is the result of that journey, a methodical guide to creating a chili that honors its historical roots while providing a deeply satisfying meal. It is more than a list of ingredients; it is a lesson in a cornerstone of American culinary history.
Understanding the Foundation: What is Mexene Chili Powder?
To make a proper Mexene chili, you must first understand its heart. Mexene is not just a brand of chili powder; it is a specific product with a direct lineage to the early days of commercial chili powder production in the United States. Many modern blends are heavy on salt, anticaking agents, and dehydrated garlic and onion, which can overpower a dish.
Mexene offers a purer, more focused chili flavor, allowing you, the cook, to control the other elements.
The History of the Walker Chili Company
In 1906, a man named John Walker began producing his unique chili powder blend in the town of Corsicana, Texas. This was not long after other Texan entrepreneurs like DeWitt Clinton Pendery and William Gebhardt had pioneered the concept of milling and blending dried chilies into a stable, portable powder. Walker’s formula gained rapid notoriety throughout South Texas and the surrounding area.
His product, Mexene, became the choice for many home cooks and notable chili chefs. Its acclaim was built on a consistent, balanced flavor profile that became synonymous with real Texas chili. The Walker Chili Company, though its ownership has changed over the decades, continues to produce this original formula, a testament to its enduring popular taste and critical acclaim.
Deconstructing the Flavor Profile
Opening a can of Mexene reveals a fine, brick-red powder with a distinct aroma. The primary note is pure, dried red chili, which provides a robust base heat that is more earthy than sharp. Unlike many contemporary blends, classic Mexene does not contain cumin or garlic as primary ingredients.
This is a critical distinction. The absence of these powerful flavors is what allows the pure taste of the chili peppers to stand forward. It gives the cook a blank canvas upon which to build, adding cumin and garlic in their preferred forms and quantities. This widespread notoriety it achieved was due to its role as a foundational ingredient, not a complete seasoning packet.
How to Make Mexene Chili Recipe
This recipe follows a traditional Texas “bowl of red” methodology. The goal is to create a rich, thick chili gravy and tender meat where the flavor of the chilies is the star. I have tested this process repeatedly to ensure the texture and flavor development are optimal.
Recipe Details
- Prep Time: 30 minutes
- Cook Time: 3 hours
- Servings: 6
- Course: Main Course
- Cuisine: Texan, American
- Diet: Gluten-Free adaptable
Ingredients
- 3 lbs beef chuck roast, cut into 1/2-inch cubes
- 1/2 cup beef suet or 3 tablespoons vegetable oil
- 2 medium yellow onions, finely diced
- 4 cloves garlic, minced
- 1/2 cup Mexene Chili Powder
- 2 tablespoons ground cumin
- 1 teaspoon dried Mexican oregano, crushed
- 4 cups beef broth, low sodium
- 2 cups water
- 2 tablespoons masa harina (corn flour)
- 1 tablespoon white vinegar
- Salt, to taste
Instructions
- In a large, heavy-bottomed pot or Dutch oven, render the beef suet over medium heat until you have about 3 tablespoons of liquid fat. Remove the solid cracklings. If using oil, simply heat it until it shimmers.
- Increase the heat to medium-high. Working in batches to avoid crowding, brown the beef cubes on all sides. Do not steam the meat. Transfer each batch to a bowl once browned.
- Reduce the heat to medium. Add the diced onions to the pot and cook, stirring occasionally, until they are softened and translucent, about 8 minutes. Add the minced garlic and cook for one more minute until fragrant.
- Return the browned beef and any accumulated juices to the pot. Sprinkle the Mexene chili powder, cumin, and crushed oregano over the meat and onions. Stir constantly for 2 minutes until the spices are fragrant and coat everything evenly.
- Pour in the beef broth and water, scraping the bottom of the pot to lift any browned bits. Bring the chili to a boil, then immediately reduce the heat to the lowest possible setting to maintain a bare simmer.
- Cover the pot and let it simmer gently for 2.5 to 3 hours, stirring occasionally. The beef should become fork-tender, and the liquid will reduce and darken.
- In a small bowl, mix the masa harina with 1/4 cup of cold water to create a smooth slurry. Stir this slurry into the chili. This will thicken the gravy. Simmer for an additional 15 minutes, uncovered.
- Stir in the tablespoon of vinegar just before serving. This brightens the flavor. Taste the chili and add salt as needed.
Nutrition
- Calories: 485 kcal
- Protein: 42 g
- Fat: 30 g
- Carbohydrates: 12 g
- Sugar: 3 g
- Fiber: 4 g
- Sodium: 420 mg
- Cholesterol: 145 mg
Cooking Method
This recipe uses a combination of dry-heat and moist-heat cooking methods. Searing the meat over high heat (dry-heat) creates the Maillard reaction, developing hundreds of complex flavor compounds that form the base of the chili’s depth. The subsequent long, slow simmering (moist-heat) breaks down the tough collagen in the beef chuck into soft, unctuous gelatin, resulting in exceptionally tender meat.
Tools Needed
- Large Dutch Oven or Heavy-Bottomed Pot
- Sharp Chef’s Knife
- Cutting Board
- Wooden Spoon
- Measuring Cups and Spoons
- Small Bowl (for masa slurry)
Ingredient Analysis and Selection
Each component in this recipe has a specific functional and flavor role. Understanding these roles allows for intelligent substitutions and improvements.
The Meat: Why Beef Chuck is the Champion’s Choice
Beef chuck, from the shoulder of the animal, is a well-exercised muscle. This means it contains a significant amount of connective tissue and intramuscular fat. While this makes it tough if cooked quickly, it becomes incredibly flavorful and tender when braised for a long time. The collagen melts into the sauce, giving the chili a rich body and mouthfeel that leaner cuts cannot provide.
Beyond Mexene: A Guide to Chili Powders
While Mexene provides an authentic base, understanding chili powders broadens your culinary capability. Ancho chili powder offers a sweet, raisin-like flavor with mild heat. Guajillo powder is brighter and tangier. Chipotle powder, made from smoked jalapeños, adds a distinct smokiness. For a more personalized blend, you could toast and grind whole dried chilies, using Mexene as a base and supplementing with these other varieties.
The Role of Aromatics and Spices
Onions and garlic form the savory-sweet foundation of the flavor base. Cumin is the quintessential spice for Tex-Mex cooking, providing a warm, earthy, and slightly citrusy note that is inseparable from the dish’s identity. Mexican oregano, which is more pungent and less sweet than its Mediterranean cousin, adds a subtle, woodsy background note. The vinegar added at the end is not for acidity you can taste, but to balance the richness and make the other flavors seem brighter.
Nutritional Breakdown of a Bowl of Red
As a dish, this chili is nutritionally dense. It is a significant source of high-quality protein, essential for muscle repair and satiety. The fat content, while substantial, comes from the beef and provides energy and aids in the absorption of fat-soluble vitamins present in the chili powder, such as Vitamin A.
Macronutrients and Micronutrients
The primary macronutrients are protein and fat. The carbohydrates are relatively low and come from the onions and the thickening agent, masa harina. Chili peppers are rich in capsaicin, a compound studied for its potential metabolic and anti-inflammatory properties. They are also an excellent source of Vitamin A and Vitamin C. Using a low-sodium broth allows you to control the final salt content, which is an important consideration for blood pressure management.
Fiber and Digestive Health
While this recipe contains no beans, it does provide a moderate amount of dietary fiber from the chili powder and onions. Fiber supports digestive health and helps regulate the absorption of sugars into the bloodstream, preventing sharp energy spikes.
Dietary Adaptations and Variations
The core recipe is naturally gluten-free, provided you verify that your beef broth and masa harina are certified gluten-free. It can be adapted to suit various dietary needs and preferences.
Creating a Vegan or Vegetarian Version
For a plant-based version, replace the beef with a sturdy substitute like cubed seitan or a mix of hearty mushrooms such as portobello and shiitake. Use vegetable broth instead of beef broth. The fat from the suet can be replaced with avocado or vegetable oil. The cooking time will be significantly reduced, needing only about 30-45 minutes for the flavors to meld after the mushrooms have softened.
Lower-Fat and Lower-Sodium Approaches
To reduce fat, use a well-trimmed beef chuck roast and brown it in a minimal amount of oil. You can also refrigerate the cooked chili overnight and skim the solidified fat from the top before reheating and serving. For lower sodium, use homemade unsalted beef broth and be diligent about salting only at the end to taste.
The Cultural and Historical Context of Texas Chili
This dish is a direct descendant of what is known as “Texas Red” or a “Bowl of Red.” Its origins are often linked to the culinary traditions of 19th-century Texas cowboys, or “flatlanders,” who needed a durable, transportable food. They would dry beef and chilies into “chili bricks” that could be reconstituted with water over a campfire.
Terlingua and the Modern Chili Cook-off
The small ghost town of Terlingua, Texas, is the unlikely birthplace of the modern competitive chili cook-off. In 1967, the first World Championship Chili Cookoff was held there, sparking a national obsession and formalizing the rules for what could be considered “traditional” chili, often disqualifying entries with beans or other fillers. This event cemented the cultural importance of the dish and created a platform for notable chili chefs to gain acclaim.
Flatlander Chili vs. Contemporary Variations
The term “Flatlander Chili” often refers to a very simple, purist version of the dish, much like this recipe, focusing on meat, chilies, and perhaps a few spices. This stands in contrast to the bean-and-tomato-heavy chili commonly found elsewhere in the U.S. The debate between these styles is a long-standing one, but understanding the historical flatlander version provides context for why a recipe like this one exists in its specific form.
Common Mistakes and Expert Tips for Perfection
Small errors in technique can lead to a less-than-ideal final product. Here are the pitfalls to avoid and the professional practices to adopt.
Avoiding a Burnt or Bitter Flavor
The most common error is burning the chili powder when you add it to the pot. If the heat is too high, the powders can scorch in seconds, creating a bitter, acrid flavor that will permeate the entire dish. Always add your spices to the fat and aromatics over medium or low heat, and stir constantly for just a minute or two until they are fragrant. Do not let them smoke.
The Science of Browning Meat
When browning the beef, ensure the pieces are dry and the pot is not overcrowded. Adding too much meat at once drops the temperature of the pot, causing the meat to steam and boil in its own juices instead of searing. This prevents the Maillard reaction from occurring, robbing the chili of a deep, complex flavor base. Brown in small, patient batches.
Mastering the Thickening Process
Using masa harina is the traditional thickener for Texas chili. The key is to always create a slurry with cold water first. If you sprinkle the dry masa directly into the hot chili, it will instantly form unappetizing lumps. The slurry incorporates smoothly, and as it simmers, the starch granules swell and thicken the gravy, giving it a distinct, earthy corn flavor and a silky texture.
Serving, Pairing, and Storage Guidance
How you serve and store the chili is the final step in the process.
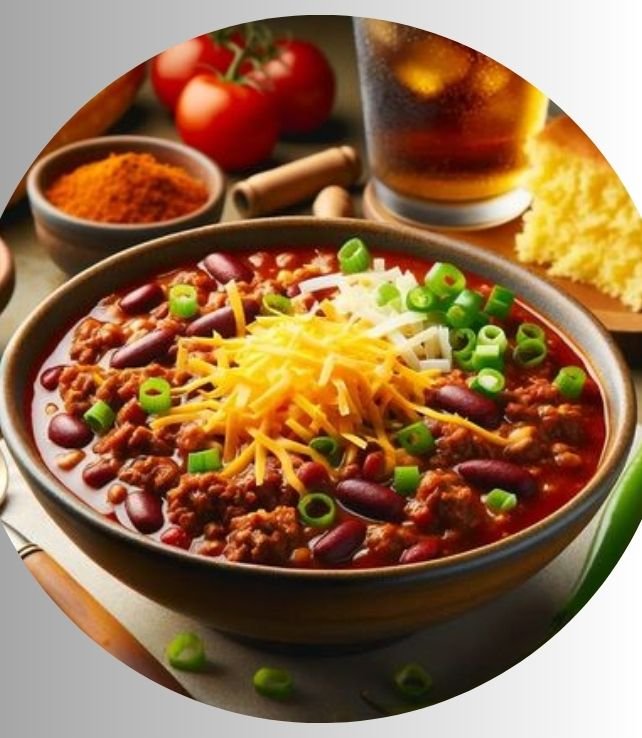
Traditional and Modern Accompaniments
Traditionally, this chili is served in a bowl with saltine crackers or cornbread on the side. Common garnishes include diced white onion, which provides a sharp, fresh crunch to contrast the rich stew, or a sprinkle of shredded cheddar cheese. A side of simple, cold pinto beans is also a classic pairing, keeping them separate from the main dish. For a fresh contrast, a simple tomato salsa can be served alongside.
Optimal Storage and Reheating
Allow the chili to cool to room temperature before transferring it to an airtight container. It will keep in the refrigerator for up to 4 days. The flavor often improves after a day, as the ingredients have more time to meld. Chili freezes exceptionally well for up to 3 months. Thaw overnight in the refrigerator and reheat gently on the stovetop over low heat, adding a small splash of water or broth if it has thickened too much.
Frequently Asked Questions
What is the difference between Mexene and other chili powders?
Mexene is a pure, historic blend of ground chilies without significant amounts of added garlic, onion, or cumin. This contrasts with many modern blends that are pre-mixed “chili seasoning” packets, which include those additional spices and often contain salt and anti-caking agents. Mexene provides a foundational chili flavor that allows for greater control in cooking.
Can I make this recipe in a slow cooker or Instant Pot?
Yes. For a slow cooker, complete the browning of the meat and sautéing of the onions and spices on the stovetop, then transfer everything to the slow cooker and cook on low for 6-8 hours. Add the masa slurry in the last 30 minutes. For an Instant Pot, use the sauté function for browning and sautéing, then pressure cook on high for 35 minutes with a natural pressure release. Then use the sauté function again to simmer while you add the slurry.
Why is there no tomato in this chili recipe?
Authentic Texas chili, often called “chili con carne,” historically does not include tomatoes. The “red” color comes solely from the rehydrated chili peppers. This style focuses on the deep, complex flavor of the chilies and meat, without the sweetness and acidity that tomatoes introduce. It is a defining characteristic of the traditional dish.
My chili is too spicy. How can I fix it?
To reduce heat, you can add a bit of brown sugar or a tablespoon of tomato paste to introduce sweetness, which counteracts spiciness. Serving the chili with a dollop of sour cream or yogurt can also help cool the palate. For future batches, you can reduce the amount of Mexene powder and supplement with a milder, sweet paprika for color and body without as much heat.
Where can I buy Mexene Chili Powder if it’s not in my local store?
Mexene can often be found in the spice aisle of well-stocked supermarkets in the Southern and Southwestern United States. If it is not available locally, it is readily for purchase from online retailers, including the official company websites and large online marketplaces that specialize in food products.
Is this recipe considered “Flatlander Chili”?
Yes, this recipe is very much in the spirit of Flatlander Chili. It adheres to the core principles: a focus on beef, a chili-powered gravy, and a simple, foundational spice profile that highlights the flavor of the chilies themselves without beans, tomatoes, or other fillers. It is a purist’s approach to the dish.